LED lights in interior design are becoming more and more popular. They are cheaper to run, very energy efficient, they last longer, don't heat up as much as other lights do. One can now find them in lamps, floor lamps, decorations of all kinds.
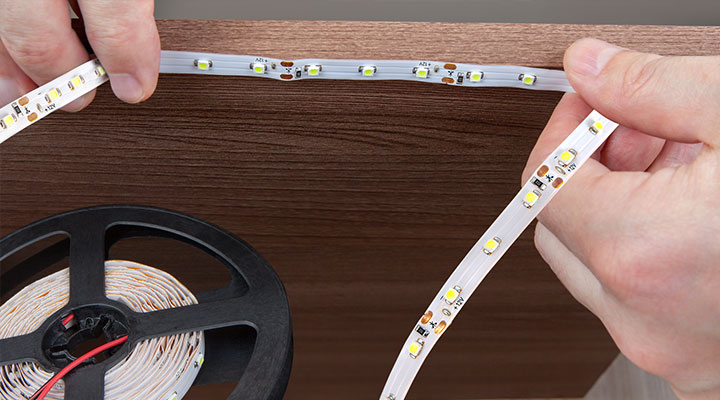
Different types of LED light strips are available as well, but they often come in a rather stiff form with a sticky layer on the back. These can be easily bent and adapted to any shape or surface. It is very easy to cut them to size as well. You would need some wire though, as those strips don't have a plug attached by default.
Restick Your LED Strips With A Proper Adhesive


Types of LED light strips
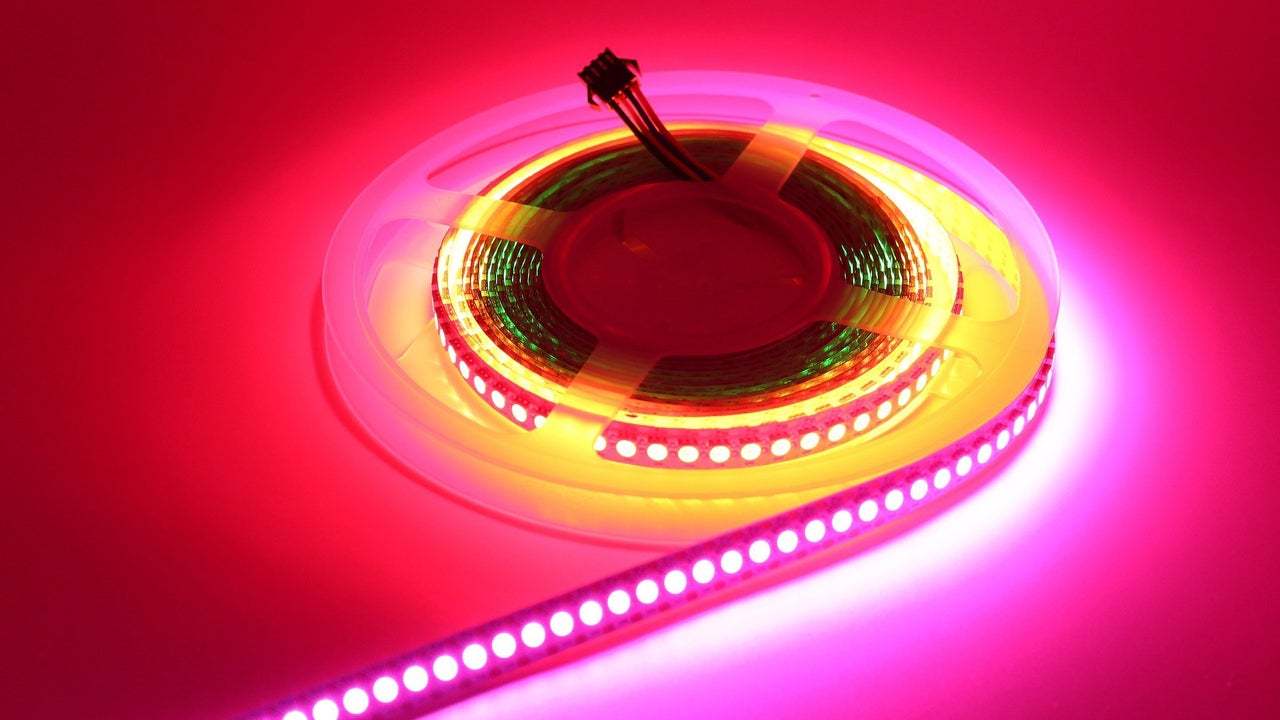
- RGB LED strip
The RGB LED light strips to have a controller where you can choose between available colors using a small remote control. These are not as flexible as the other types, so they work best when used for accent lighting around borders or patterns on the floor. They do come in many different forms and with very interesting designs (check out some of these).
One downside to this type is that it uses individual LEDs, which means every 3rd LED must be attached to the controller chip. As they are spaced apart properly though, this does not constitute any problem or loss of efficiency.

 Plus
Plus
 Minus
Minus
- SMD 5050 LED strip
These types of strips use one large flat surface area per led rather than multiple smaller ones like the RGB-controlled ones do. They are therefore more efficient, but the downside is that they are not as flexible. That means you can't bend them or twist them around corners as easily. You will need wire to attach your strips to the power supply, which needs to be plugged into a socket for this type of strip.

Plus
Minus
- LED rope light
This type of lighting is most often used for decoration purposes and as accent lighting. This type has a more 'fluid-structure than the other two types, but it also doesn't use individual LEDs which makes the rope more flexible and easier to bend/twist into desired shapes or patterns. The ropes are usually cut off at regular intervals to ensure even spacing between each LED light. These can be connected directly to a power supply as they come with their own plug attached.

Plus
Minus
But what if you want to bend it again? Or change its orientation? Is this possible without destroying it? Will it still work after that? Let's find out!
Can you remove LED strip lights from the wall and reuse them?
It is possible to remove those types of LED strips from the wall without damaging the paint or surface where it was attached. How? Use a hairdryer!
Take your hair dryer and set it as hot as you can get it (but don't burn yourself!) and start blowing hot air on the sticky side, moving the blow dryer back and forth evenly over its entire surface until you feel it slightly getting softer and slightly moist/tacky like glue does after pulling off some tape.
Now carefully pull up on one corner and continue pulling at different spots until there's enough peeled off for you to grab onto with your fingers. Congratulations, you've just successfully removed an LED strip from the wall without damaging it!
How to check out whether it works correctly?
When you remove the LED strips there is a chance it was damaged, so you have to examine it before re-using it. To do this you will need to find a power source that can provide at least 10V DC or AC, or even 12V if the LED strip is 24V DC. If that isn't available in your home just leave it aside for now.
If you have access to a voltmeter then great! Use the multimeter's ohm function and check out whether there are any connections between cables number 1 and 2, 3 and 4, etc.
If you don't have an ohm meter but own a digital multi-tester, use its continuity test instead (if it has one) with everything connected properly so far so that it beeps when testing. Connections shouldn't be open (no sound) and the beeping should be continuous - if it isn't, something is wrong and you'll need to check where the problem lies.
Using a voltmeter is slightly more complicated as you first have to find out which pair of cables corresponds to red and black power wires, or positive and negative for DC strips powered by batteries.
If there is more than one such connection then choose one that isn't used (as best you can tell) for powering other things like LED light controllers. That's how you determine which wire is positive and which wire is negative, so now connect them properly according to their voltage rating: red always gets +12V/-12V, etc., black always gets the other value on the meter depending on whether it's AC or DC.
For AC powered LED strips you can use a USB power bank or any other 12V source capable of supplying at least 1A output to test it out, for DC strips you need batteries that provide enough voltage - 2AA batteries will do just fine, but if you have 4 then better use them instead. If the LED strip lights up then congratulations! You just saved yourself some money by reusing old stuff.
If your LED light strip doesn't light up check whether everything is connected properly (use ohm meter for this) and make sure there are no broken connections in cables or anywhere else on the strip itself.
What do you need to be careful about when you decide to reuse LED strip lights?
Make sure you turn all power off before removing any LEDs. If this is not done, you will end up burning out the LED chips (and most likely some of them will get damaged) thus rendering your LED strip unusable.
All strips use different types of connectors, but most often they are either push or click-in connectors with a latch holding them together. Be gentle when reattaching these in order not to break them; especially if they are very small and fragile like on LED rope lighting.
How to restick LED lights again?
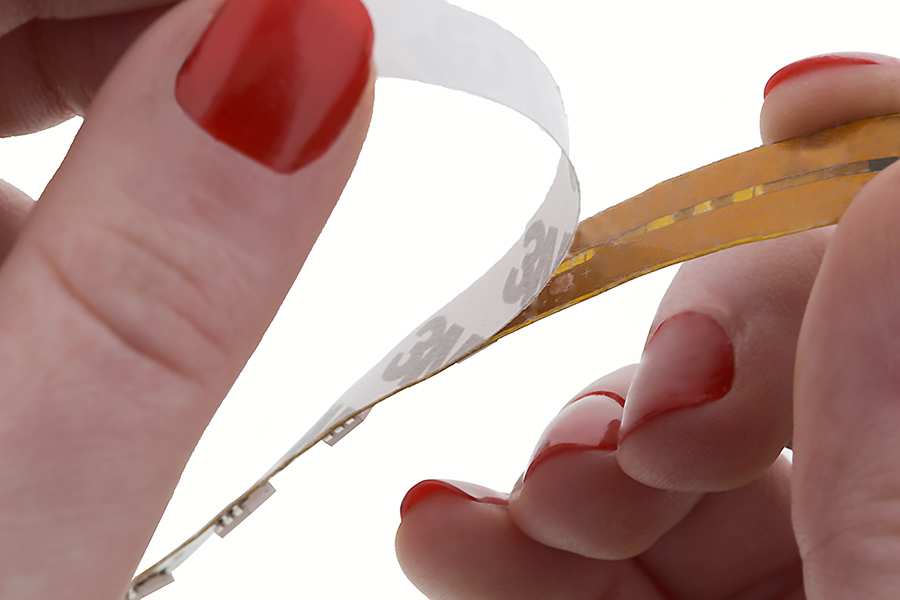
After that, you might want to reuse LED lights it after all. This means sticking it back onto the wall again. The easiest way would be through the use of adhesive tape already cut into stripes, which is basically double-sided tape with large pieces of paper on either side of them for you to peel apart.
There are lots of different types available, so check out where you can buy some online or maybe at your local hardware store/pharmacy department if they have something similar available.
If you don't have any ready adhesive strips, there are other ways too though! For example:
- You could use a glue gun which is what I did when trying this out myself recently. It works pretty well and is really easy to apply evenly, but it also means you have to actually press the LED strip down onto the wall really hard so that it sticks properly.
- Another option is superglue, but be VERY careful when applying this as not to get any of it on any other part of your strip other than where you want it to stick. This can be very difficult because you will probably not see exactly where the glue lands.
- Finally, there's a double-sided tape that can be used 2 times before eventually deciding on using a glue gun for my latest project. It worked great too though and once again didn't require me to push down with any force or exert pressure whatsoever which made things much easier.
As always make sure to read through everything very carefully before attempting anything.
Can you use superglue for these purposes?
Yes, as mentioned above you can use superglue to stick those LED strips onto the wall again should you wish to do so. Make sure that the only place it sticks is where you want your strip to be and that there's no way it can leak and damage other parts of your strip though.
How to use cable ties to attach your LED light strip again?
It's extremely easy to attach them again, but you'll have to cut the length of your strip down a little bit so that it can be fitted under the cable tie or zip tie. Doing this is very simple; just cut off any excess with some scissors, then slip it underneath and tighten the cable/zip-tie around it.
How to solder LED strips together?
If you're planning on using multiple LEDs (stripes) of one single color all connected up like one big led strip light, then soldering them together would be needed for having your LEDs all act as one bigger unit.
This means cutting out enough wire from inside the long strip of tape where they are all joined up (solder points) and soldering them together with a soldering iron, making sure they are stuck by using electrical tape afterward.
- Make sure you have enough wire for this to work properly before even attempting it.
- Leave the led strip on the solder points while doing this or else when you move your soldering iron around you will melt your strip.
- We're talking about the heat here, so be extremely careful not to burn yourself in any way whatsoever if you decide to solder your LEDs together.
How do you know which side of my LED light strip is positive and negative?
The polarity can usually be figured out by looking at one of the LEDs on the strip itself; where there is an arrow pointing in one direction (positive) there will also be a line (negative) in the opposite direction.
How to make an on/off switch for LED light strips?
There are 2 different ways of adding a switch; one is taking apart some old electronics equipment like an old radio, game console, or something similar that has had the power unit removed already. You can then solder wires onto where the voltage was coming into it and just cut out a section big enough for your strip to fit through before screwing everything back together again.
The other option is soldering the main power cable of your device directly onto the long leg of each LED strip instead of cutting them all up so you can always turn it off without unplugging anything. It's definitely not recommended to use any kind of mains wiring device with your LED's though as this may result in fire, electrocution, or electrical shock.
How to remove sticky film from the LED light strip?
You can do this by using either a hairdryer to warm the glue-up first or using either Goo Gone or WD-40 if you don't have any of those items available at home already. Take it slow and be careful when doing this because you don't want too much heat on one part of your strip for too long otherwise melting might take place.
How to reuse LED light strips?
You can reuse LED strips in various ways, but it mostly depends on what you want to do with them. Some people will use smaller ones for decoration purposes around their home or garden, while others take the long strips and cut them up so there are more usable areas for lighting something else up. You can always restick LED strip somewhere else again by using super glue or another type of strong adhesive for this purpose.
How to restick led lights and where?
Other than just taking apart old electronics equipment, here are a few you might be able to think of; decorating walls, outdoor patios/entertainment areas, under cabinets in kitchens or bathrooms, putting them into plant pots (including potted plants) to light them up at night or even using them as a headlight for your bike.
Just make sure to take an old cassette tape and cut the side down so you can fit it over your handlebars, then secure it in place with some electrical tape afterward before resticking the LED strip on top.
Conclusion
If you're looking to re-use and restick your LED light strips, then the answer is: maybe. It depends on how big they are and what exactly you want to do with them? If it's a small strip of 5 or fewer LEDs for decoration purposes, then go ahead and cut them apart as many times as you like.
However, if it's a long strip (like 24+ LEDs) then most likely isn't going to work unless you solder the whole lot together first before cutting up. Depending on its size, this could be difficult though so we advise against attempting this unless you know what you're doing first just in case something bad happens.